My email provider told me that I would not get my mail (POP3) no more, because Outlook does not support the TLS 1.1 version.
So good bye Outlook, hello Thunderbird, but … I still want to have access to all my messages. This is not an easy task.
There are several websites proposing a solution :
How to Transfer Outlook Emails to Thunderbird Easily
https://www.freeviewer.org/blog/import-outlook-mail-to-thunderbird/
But they want me to buy a special application. Not interested in doing that because I got no more than two PST files to convert and then I am done.
I already knew that there is a tool to convert PST files to a mbox format …
It is the libpst Utilities …
https://slackbuilds.org/repository/14.2/libraries/libpst/
“libpst” is a MS Outlook Personal Folders converter. The libpst project includes a library and a set of utilities to decode
and convert MS Outlook PST files. The tool I need is readpst for to convert PST files to mbox and other formats
Further information can be found here :
https://www.kali.org/tools/libpst/
First the utilities have to be installed ..
sudo apt install pst-utils
Then the mailbox conversion has to be performed
$ readpst -u 1.pst
Now that I have converted the data file to the mbox format I was looking for a way to import the file to the Thunderbird application
The decisive hint came from …
Import MBOX to Thunderbird – A Complete Step by Step Guide
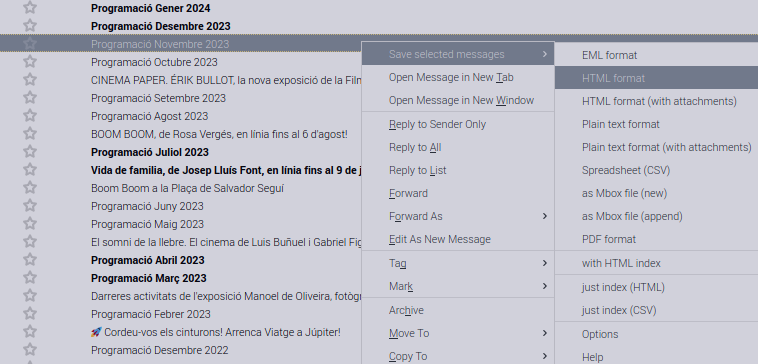
For to import to Thunderbird the “ImportExportTools NG” can be used· It is completely free.
(https://www.bitrecover.com/blog/import-mbox-to-thunderbird/ is recommending the Thunderbird import wizard – This is also a software I would have to pay for …).
The setback of this method is when importing the mbox formatted data there are many folders with the foldername mbox created , for instance …
mbox123
mbox147
mbox111
mbox132
etc.
That means … the “ImportExportTools NG” does not keep the namens of the Outlook folders. It puts “mbox” there followed by a number.
After the migration I have to change the name of these folders,there are nearly one hundred folders to be renamed so there is quite a lot of work to be done.
At a certain point I have been worried about where to find the storage place of my mailbox.
That s not hard to find with a right click on the inbox, it appears as …
/home/pi/.thunderbird/togys4ze.default-default/Mail/pop.gmx.net/Inbox.sbd